DigitalOcean offers developers and businesses a reliable, easy-to-use cloud computing platform of virtual servers (Droplets), object storage (Spaces), etc.
Deployment Guide
1. Sign in to TryDirect.
2. Choose a stack you'd like to deploy. Let's assume we have selected the WordPress stack. Click "Deploy To" and select DigitalOcean. We have to add the "Personal Access Token" on the next page. You can obtain it right from the DigitalOcean dashboard.
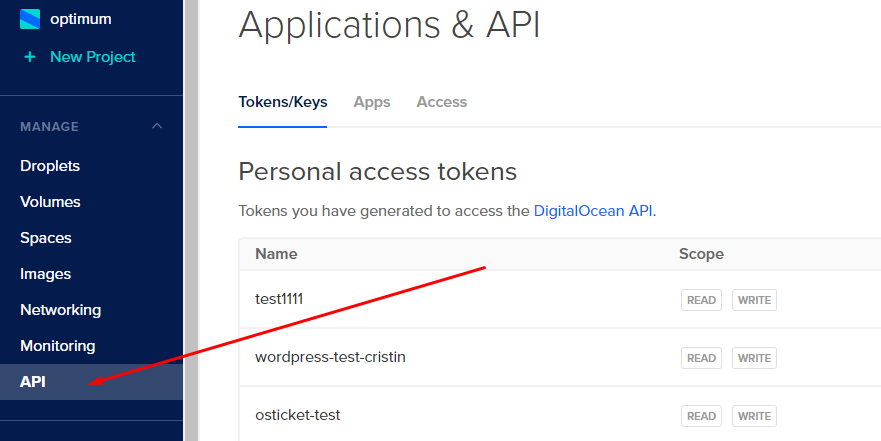
3. To do this, go to the DigitalOcean dashboard and click the API tab on the left sidebar.
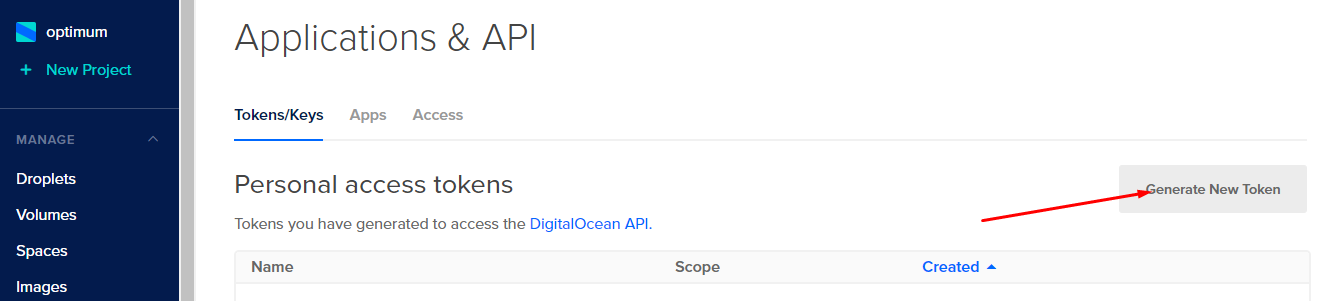
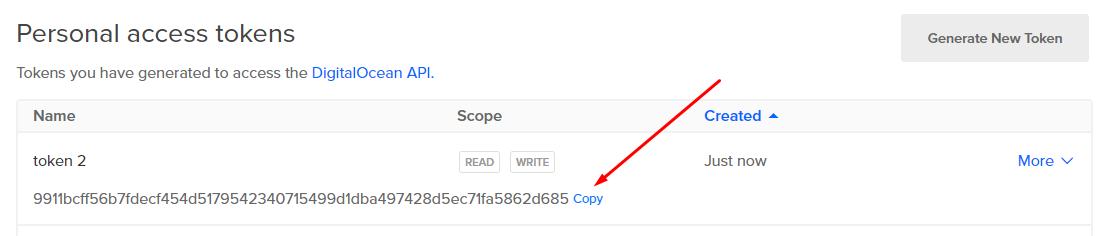
4. Find the "Generate New Token" button on the right side and click it.
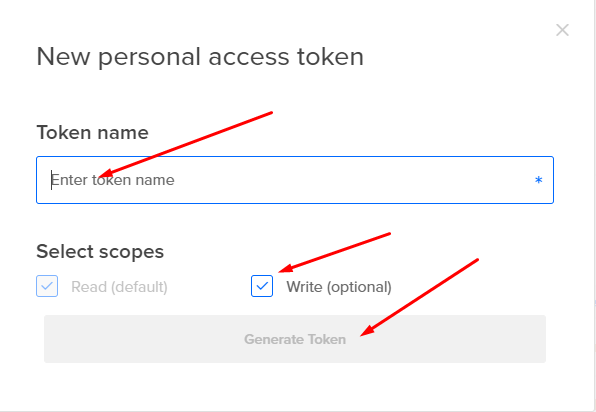
5. Type any text in the "Token Name" input field, for example, "Token for TryDirect," and click the "Generate Token" button below.
6. Copy your new Personal Access Token and save it to the file on your PC, or to the password manager. You will need this token later.
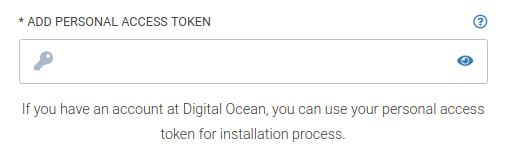
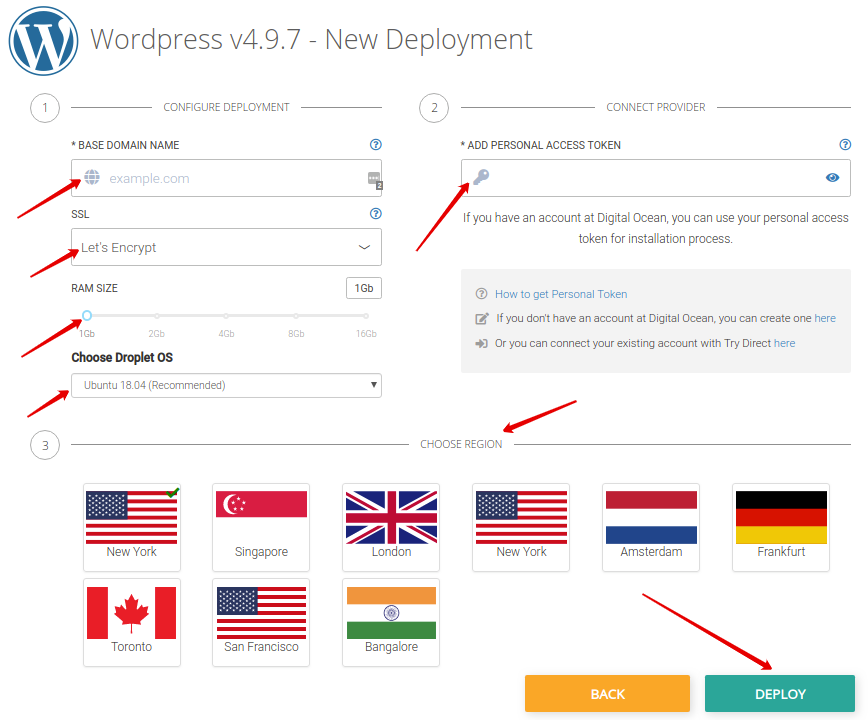
7. Now go back to TryDirect. Paste the token into the "ADD PERSONAL ACCESS TOKEN" input field, add your preferred domain name, customize your droplet RAM size, droplet OS and Region if needed, and click the Deploy button.
8. You may see the progress status and wait up to 5-15 minutes until it is completed.

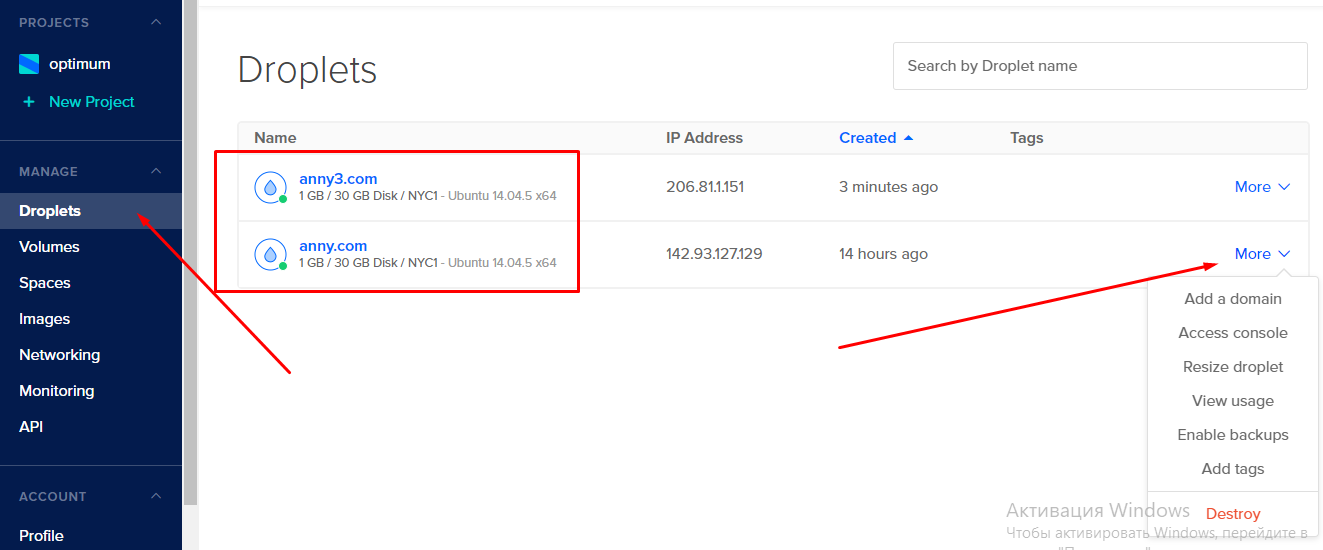
9. After deployment is finished, you can check the result by going to the DigitalOcean dashboard and checking if the server is created. Click the Droplets tab on the left sidebar menu and choose from the options you want to proceed further.
10. Refresh the TryDirect page and click on the Info button to find out how to apply the SSL certificate.

11. TryDirect offers a tool called Status Panel. It aimed to help with easy SSL setup. You can also check the status of all deployed containers on your server. You will receive an E-mail notification with the link to your server IP address, login and password right after the stack is successfully deployed.
How to apply SSL
STEP 1
Before you apply any of the SSL options available, you need to go to your website provider or host (GoDaddy, Namecheap, Bluehost, Name.com, Dreamhost, and others) and point your domain to hosting with an "A" record. Choose the domain name you wish to create an "A" record for and click DNS Records. Here, you will add the desired "A" record.
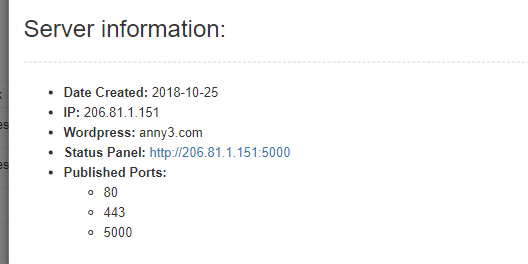
An "A" record associates a name to the server IP address, allowing people to use easy-to-remember domain names (secure.yourdomain.com >> 11.222.333.444). Thus, the DNS "A" record should point to your new server IP (see above in "Server information").
Note: When TryDirect creates Droplets for DigitalOcean, SSL is automatically added to your DNS. This is a great feature, and you don’t have to add it manually. Just enter your account on DigitalOcean, find the “Domain Name Registrar” tab, and just add NS servers:
- NS1: ns1.digitalocean.com
- NS2: ns2.digitalocean.com
- NS3: ns3.digitalocean.com
Check this link and find out how to update NS records at your Domain Registrar -
STEP 2
TryDirect offers a particular stack application called Status Panel to deploy which simplifies the SSL certificate post-deployment process. The Status Panel is used to help you activate/deactivate SSL certificates and manage stack docker containers. Here you can also check the status of all deployed services on your server. You will receive an e-mail notification with the link to your server IP address, login, and password right after the stack is successfully deployed.
Enabling SSL ensures that your visitors can browse your website safely and securely. Click the Status Panel link and introduce login and password. Enable SSL button will be green colored when a domain is attached to the server. Otherwise, you have to wait for a couple of minutes.