Amazon Web Services (AWS) is the world’s most comprehensive and broadly adopted cloud platform, offering over 165 fully-featured services from data centers globally.
Follow the steps:
- Generating policies
- Logging into the root account and creating a separate IAM user/users
- Giving permissions to new user/users and allowing them to manage instances
If you do not have an AWS account, you need to create one. Visit AWS signup, and then choose the ‘Create an AWS Account’ option from the top menu.

Step 1 - Generating Policies
Instead of classifying newly added users in groups, you can manage permissions through policies attached to those groups.
(a) Inside the IAM dashboard, you will find a link to “Policies” on the right sidebar. But where you want to go is the "Identity providers" link right under the “Policies.”
(b) Click it, and a list of available policies will appear, including Administrator access, Alexa for business device setup, Alexa for business full access, Alexa for business gateway execution, etc.
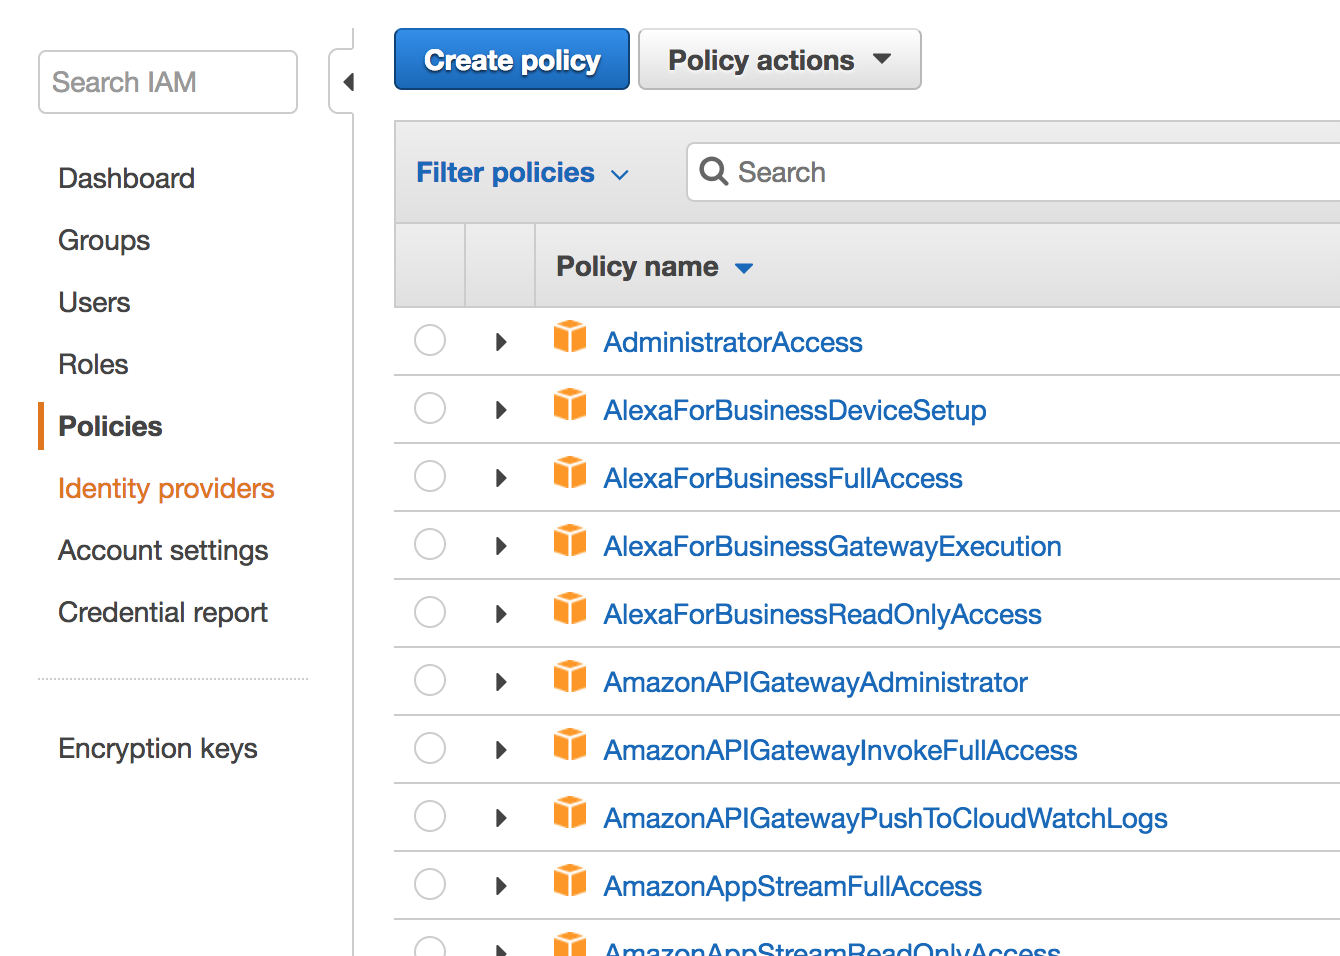
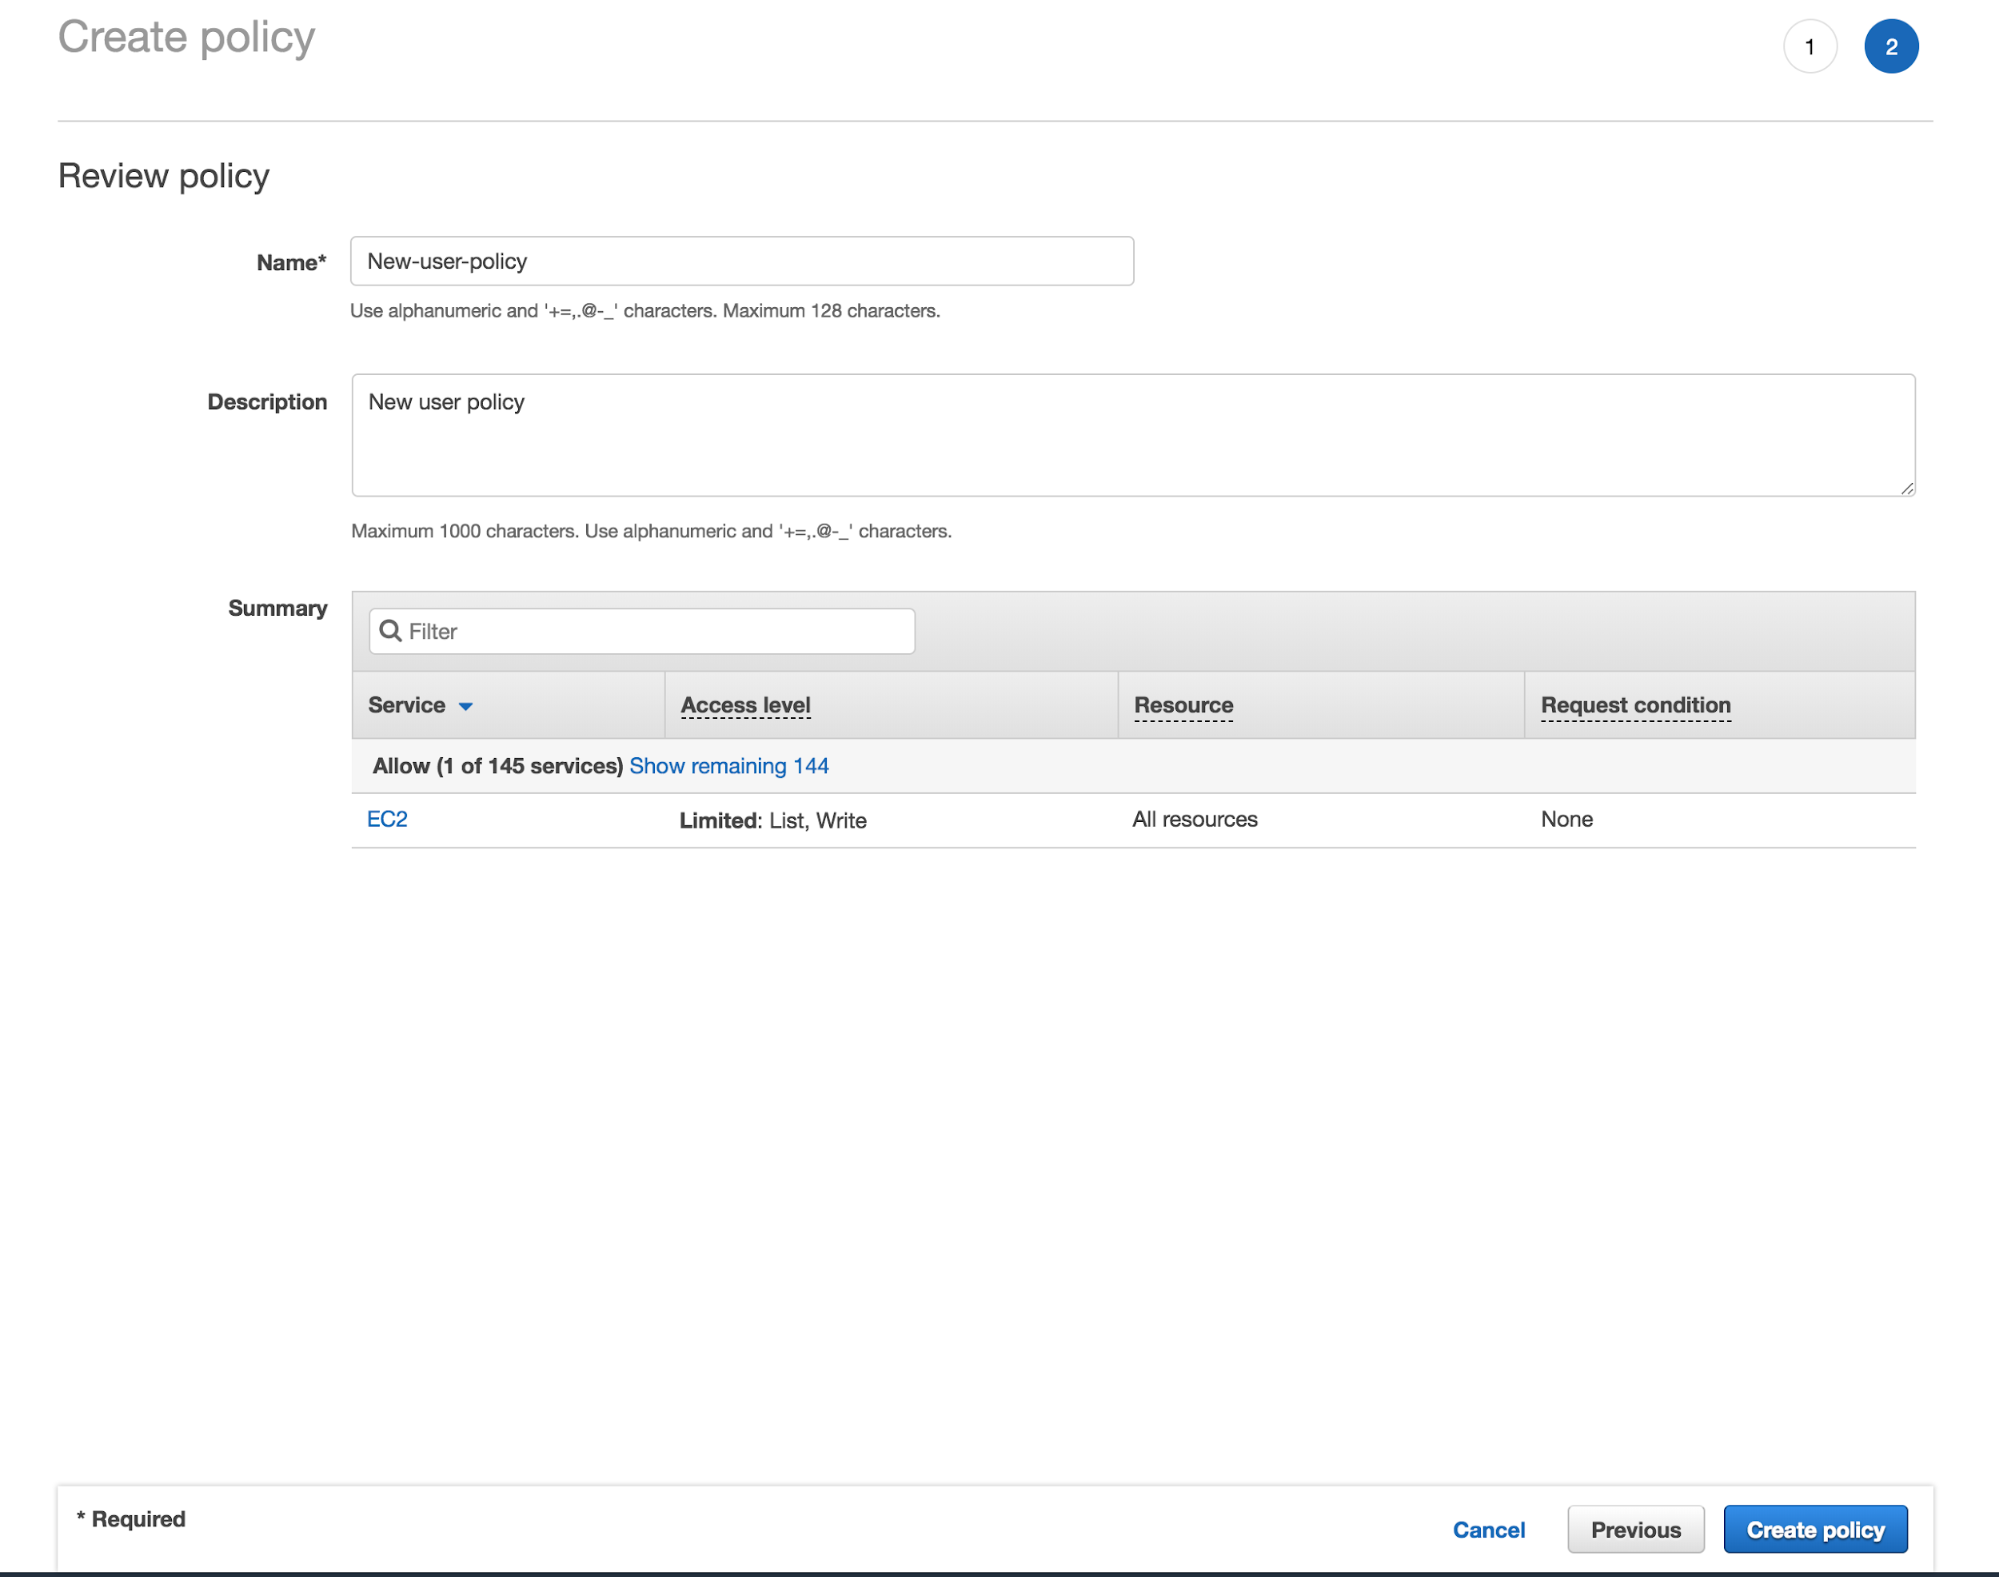
(c) However, you have to ignore this list. Choose the ‘Create policy’ option above and you will be taken to a separate page where you have to fill in the Name and the description of the new policy.
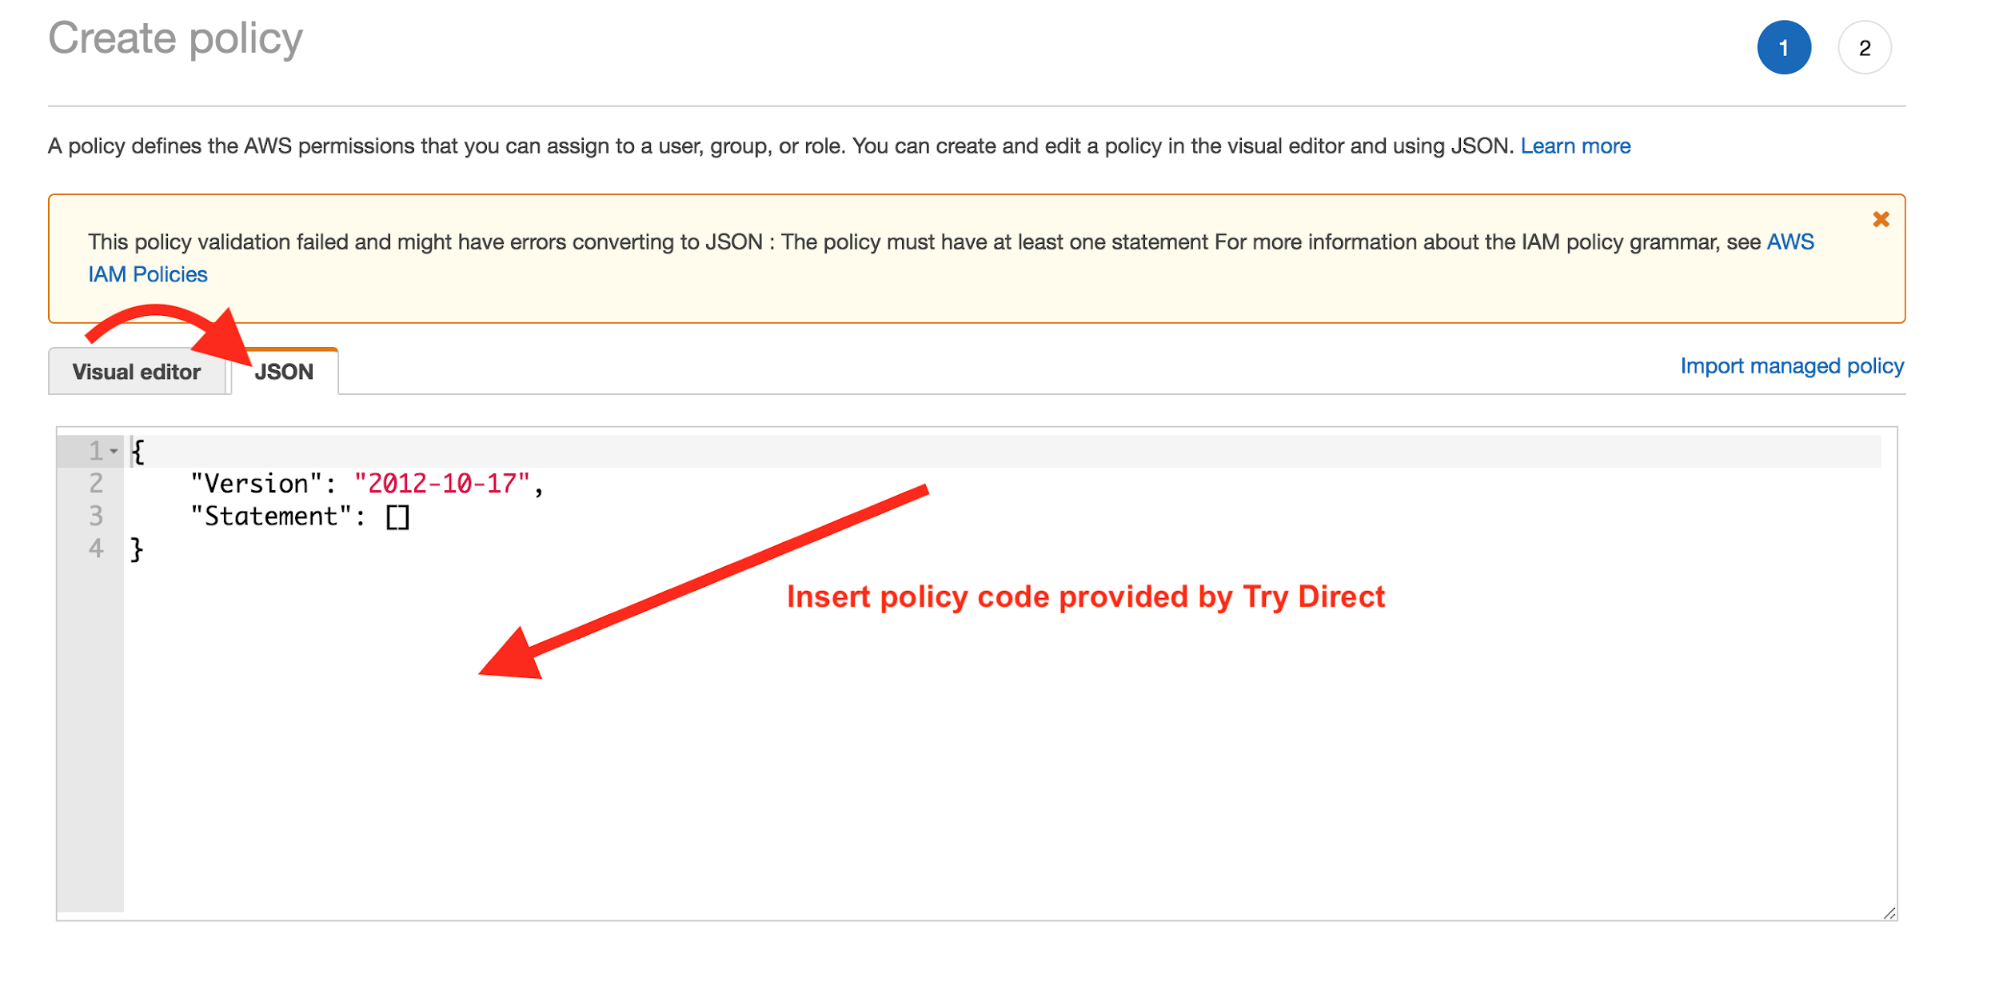
(d) Now, you’ll need a policy code provided by TryDirect (see below). Remove everything from the JSON window and paste the code below into that window.
{
    "Version": "2012-10-17",
    "Statement": [
        {
            "Sid": "VisualEditor0",
            "Effect": "Allow",
            "Action": [
                "ec2:DescribeImages",
                "ec2:AuthorizeSecurityGroupIngress",
                "ec2:DescribeInstances",
                "ec2:ImportKeyPair",
                "ec2:CreateKeyPair",
                "ec2:CreateSecurityGroup",
                "ec2:CreateTags",
                "ec2:DescribeAccountAttributes",
                "ec2:RunInstances",
                "ec2:DescribeKeyPairs",
                "ec2:DescribeSubnets",
                "ec2:DescribeSecurityGroups"
            ],
            "Resource": "*"
        }
    ]
}
Important! In case you want to allow TryDirect to create a domain and attach it to your server instance, you will need to add the following rules:
{
    "Effect": "Allow",
    "Action": [
        "route53:GetHostedZone",
        "route53:ListHostedZonesByName",
        "route53:CreateHostedZone",
        "route53:DeleteHostedZone",
        "route53:ChangeResourceRecordSets",
        "route53:CreateHealthCheck",
        "route53:GetHealthCheck",
        "route53:DeleteHealthCheck",
        "route53:UpdateHealthCheck",
        "ec2:DescribeVpcs",
        "ec2:DescribeRegions",
        "servicediscovery: *"
    ],
    "Resource": [
        "*"
    ]
}
As a result, the code will be:
{
"Version": "2012-10-17",
"Statement": [
{
"Sid": "VisualEditor0",
"Effect": "Allow",
"Action": [
"ec2:DescribeImages",
"ec2:AuthorizeSecurityGroupIngress",
"ec2:DescribeInstances",
"ec2:ImportKeyPair",
"ec2:CreateKeyPair",
"ec2:CreateSecurityGroup",
"ec2:CreateTags",
"ec2:DescribeAccountAttributes",
"ec2:RunInstances",
"ec2:DescribeKeyPairs",
"ec2:DescribeSubnets",
"ec2:DescribeSecurityGroups",
"route53:GetHostedZone",
"route53:ListHostedZonesByName",
"route53:CreateHostedZone",
"route53:DeleteHostedZone",
"route53:ChangeResourceRecordSets",
"route53:CreateHealthCheck",
"route53:GetHealthCheck",
"route53:DeleteHealthCheck",
"route53:UpdateHealthCheck",
"ec2:DescribeVpcs",
"ec2:DescribeRegions",
"servicediscovery:*"
],
"Resource": "*"
}
]
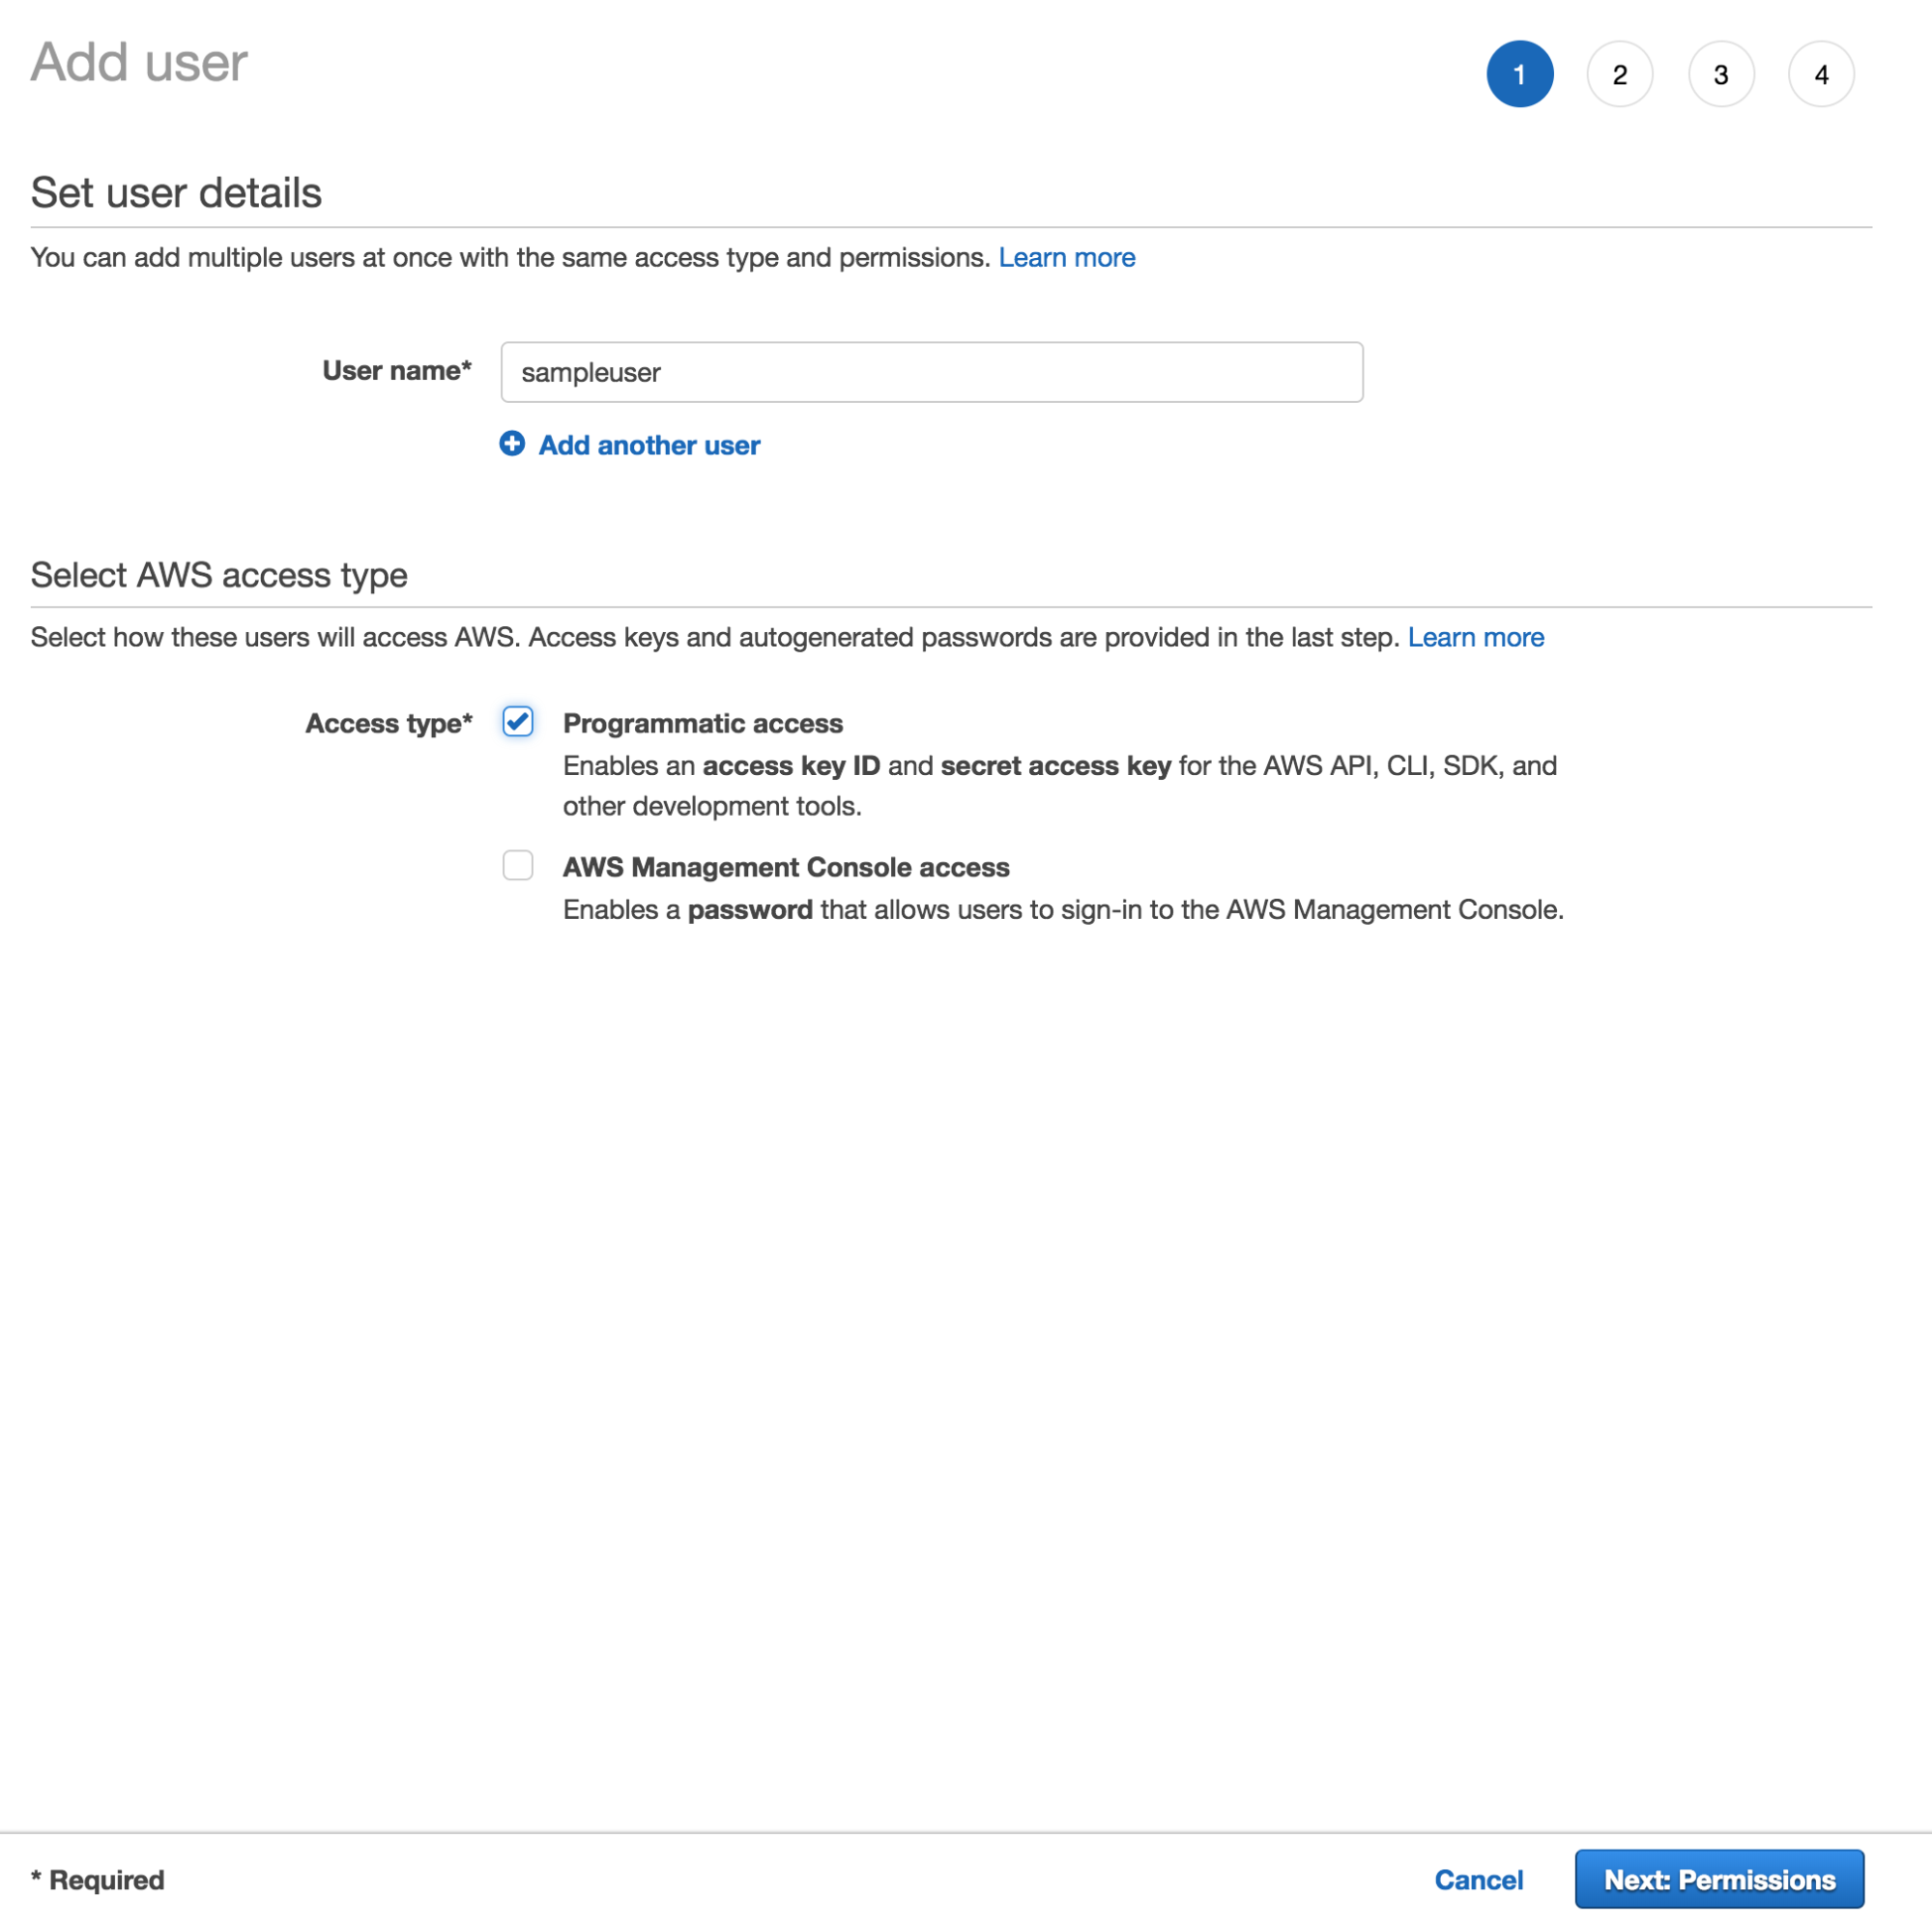
}Step 2 - Creating an IAM User in Your AWS Account
Once you have a new policy, you can create new IAM users, and give permissions in your Amazon AWS account in the following cases:
- When there is a new member on your team;
- When you create a new application that needs to make API calls.
To create a user you need to follow the steps below:
(a) Create the user in the AWS Management Console by manually filling in the username
(b) Create a password for the user. You have two options to create passwords:
- Auto-generated password where each user gets a randomly generated password
- Custom password where the password you type in the box is assigned to each user.
Do not bother creating access keys for a user who requires access only through the AWS Management Console.
Step 3 - Give Permissions To Users
You can now give the user permissions to perform the required tasks by:
(a) Checking the box beside programmatic access since the user may require access to the API, AWS, and other tools. This will allow the creation of an access key for each new user. After this, go to the bottom of the page and click ’permissions’.
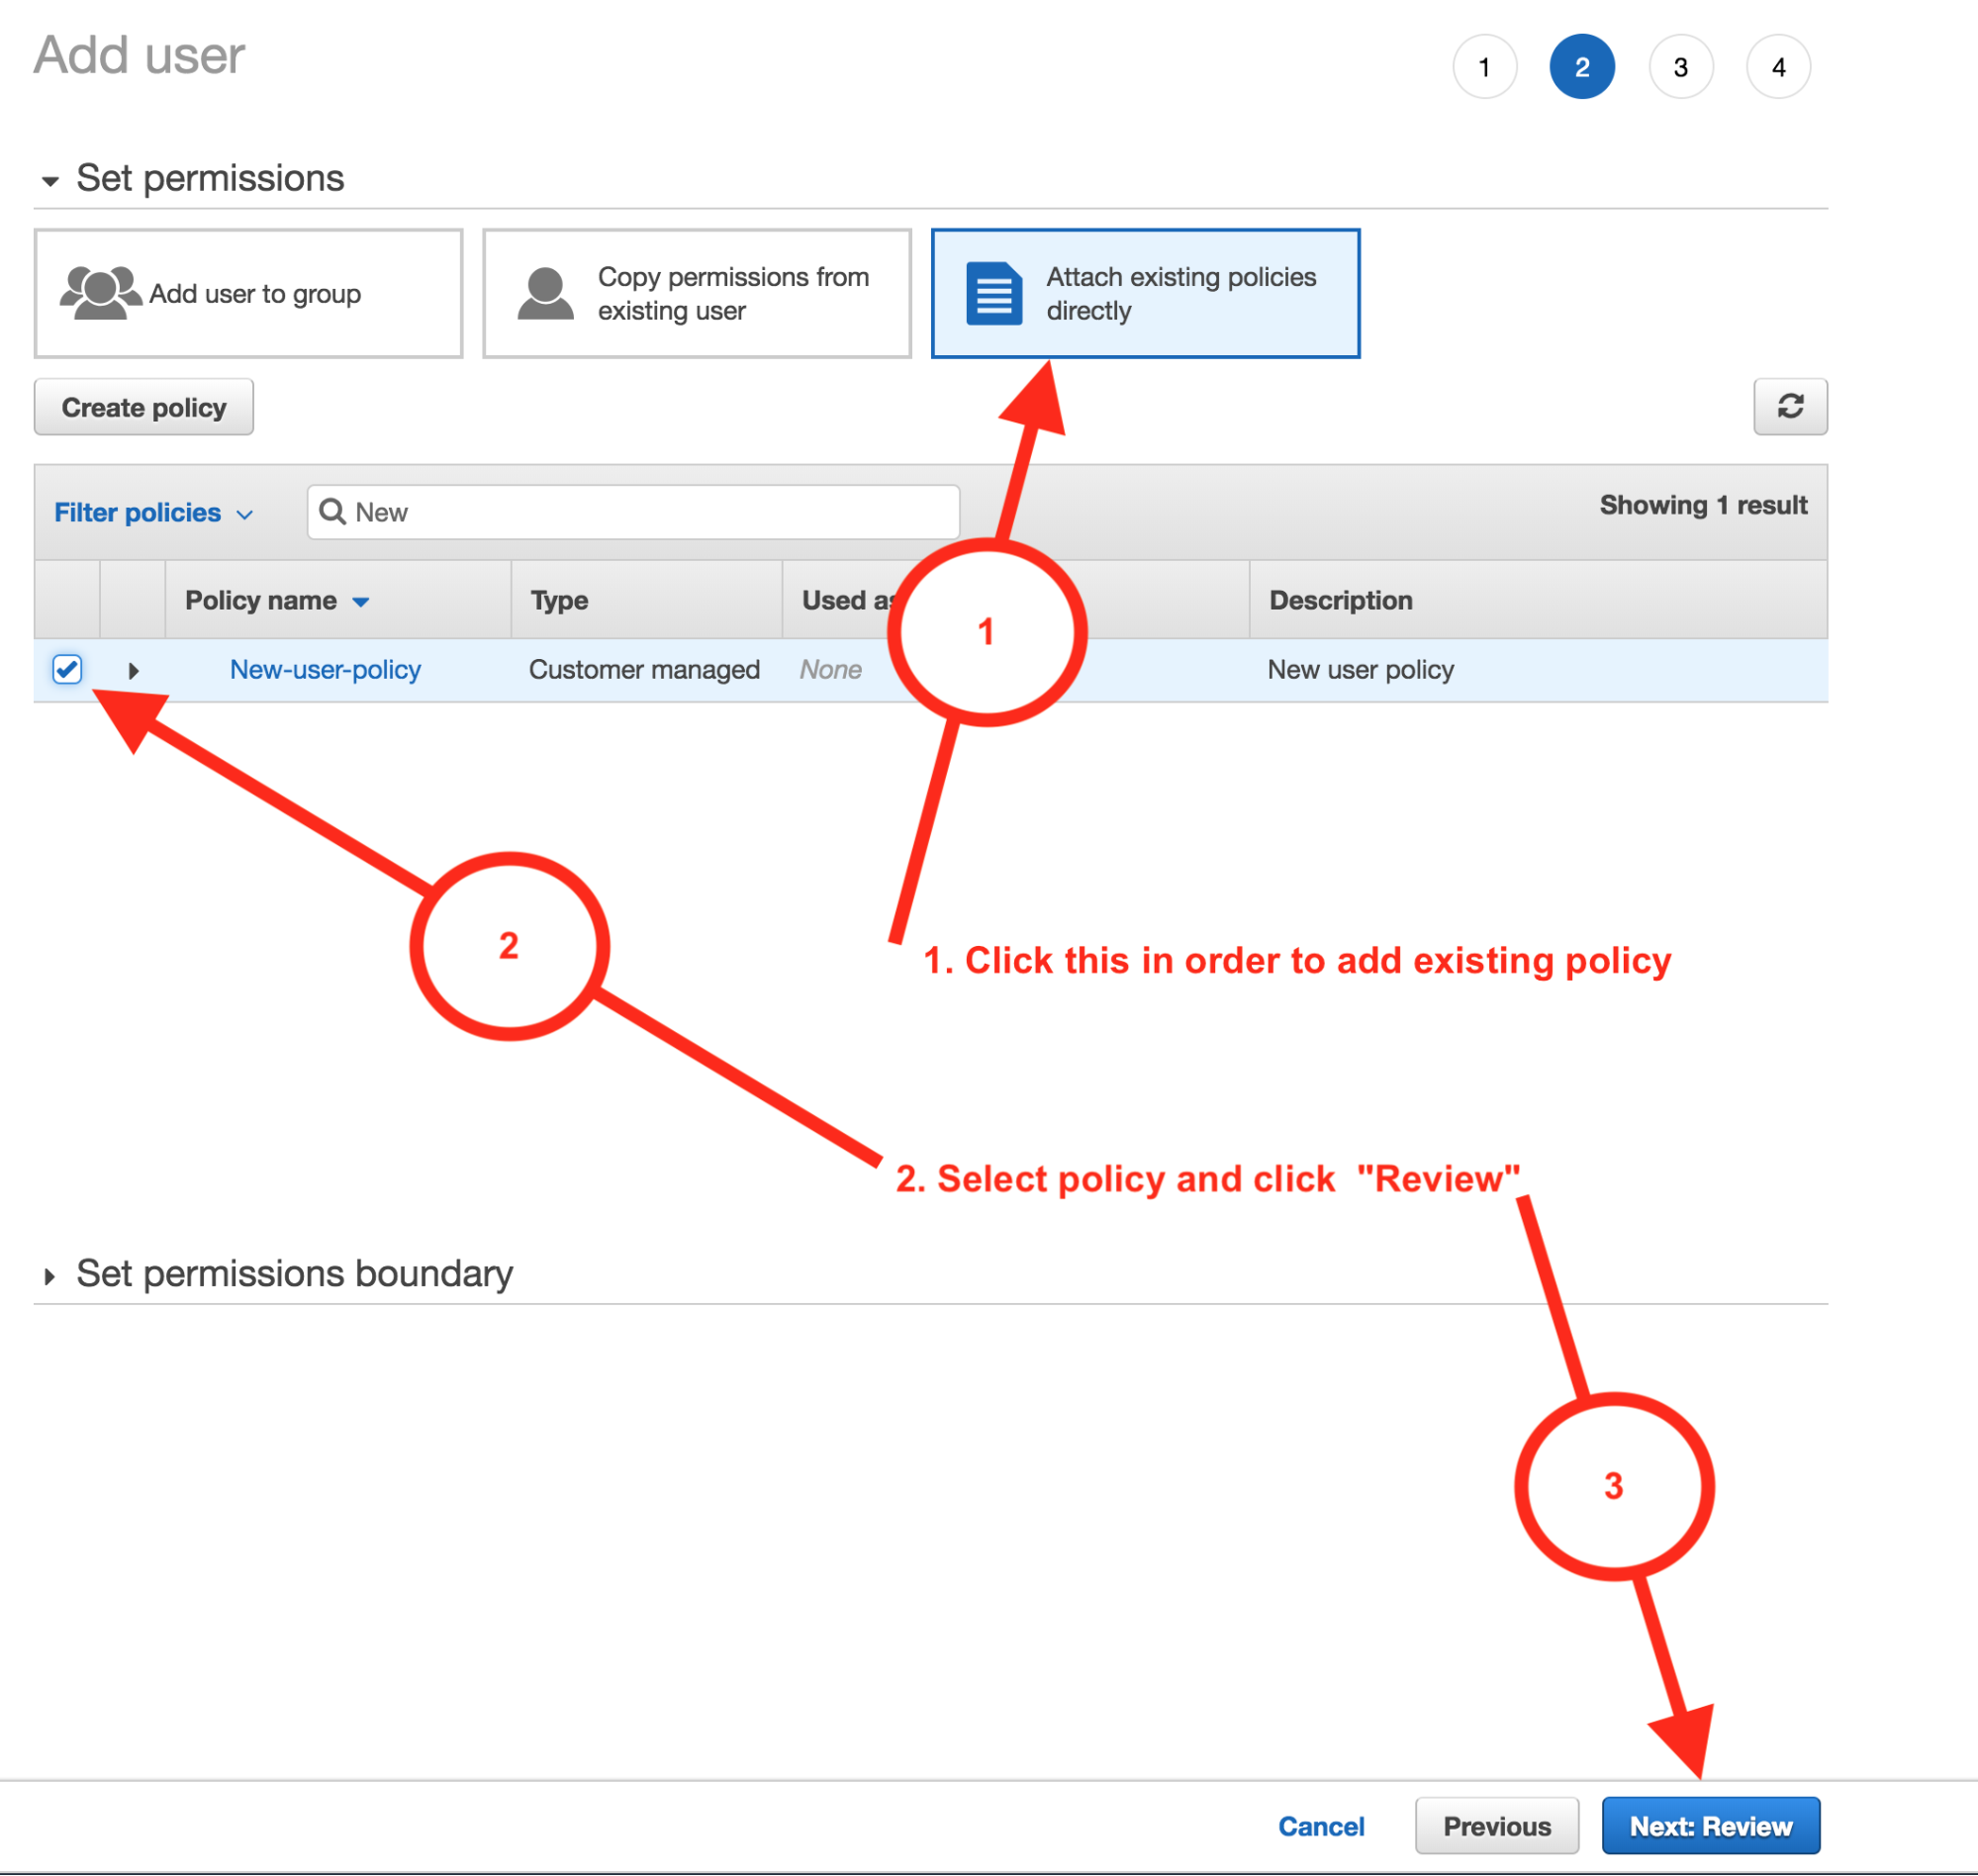
(b) Now, since you already created a policy in step 1, you have to click the link that says “attach existing policies” directly at the window's top right corner.
(c) Once you do this, a list of existing policies will appear, including the one you created in Step 1. Using this method, you can add more users to one or more groups and grant permissions by attaching permission policies directly to the user.
(d) Click ‘review’, and you will find the “Access KEY ID” and the “Secret access key” required to start deployment on TryDirect install page.
(e) Once you are done, you can hand over the necessary sign-in information to the user. It includes the following:
- The password you created for the user
- The URL for the account sign-in page.
You will find the “Access KEY ID” and “Secret access key” required for the Try Direct install page on the next page.
More Configurations
On the Set permissions page, specify how you want to assign permissions to the particular set of new users. If there is any need, you can limit a user's permissions using a permissions boundary. This is an advanced feature.
- The “Set permissions boundary” section enables you to use a permission boundary to control the maximum allowance of user permissions.
- "Add user to group link" allows you to assign the users to one or more groups that already have permission policies. You can select one or more existing groups or choose "Create group" to create a new group.
- The "Copy permissions from existing user link" allows you to copy all group memberships, attached managed policies, embedded inline policies, and any existing permissions boundaries from an existing user to the new users. Select the one whose permissions most closely meet your new users’ needs.
- The "Attach existing policies to the user directly" (explained in step 3) allows you to see a list of your account's AWS managed and customer-managed policies.
- Select the policies that you want to attach to the new users.