
What is WireGuard
WireGuard is a modern cross-platform VPN that uses cryptography. It is known for its high speed, simplicity, and effort to become even faster and more straightforward. WireGuard is believed to be the main competitor of OpenVPN. Here are the main power points WireGuard creators are proud of:
- The latest cryptography: Noise protocol framework, ChaCha20, Curve25519, BLAKE2, SipHash24, HKDF, Poly1305, etc.
- Easy configuration and deployment due to exchanging the simplest public keys.
- Easily auditable for security vulnerabilities
What does the WireGuard stack include
A basic WireGuard stack environment is built using Docker Compose. WireGuard requires server and client setup. Server side includes:
- WireGuard docker container
- Post-configured iptables
- Config files synced to the host machine
Number of servers required: 1 VPS
Who is using WireGuard
- Software developers
- System/Network Administrators
- DevOps engineers
- Common users
What are the benefits of using dockerized WireGuard stack
- The quickest and most simple way to start using VPN
- Easy upgrade to the latest version provided by Docker
- Painless app migration between cloud providers
- Secure servers updates
VPN Client Configuration
Mobile device
To configure WireGuard on your mobile device, scan the QR code that’s attached to the deployment notification email called peer1.png
Ubuntu Linux PC
sudo apt-get install wireguard1. Copy config file from email attachment */peer1/peer1.conf to /etc/wireguard/wg0.conf
sudo cp ./peer1/peer1.conf /etc/wireguard/wg0.conf2. Start WireGuard with the following command:
sudo wg-quick up wg03. Check the WireGuard status by executing the following command:
sudo wgHow to register more VPN users
If you want to add additional VPN clients, you can increase the PEERS parameter in the docker-compose.yml file on the VPN server. After changing this value, you will need to restart the docker container with the --force-recreate parameter.
For that, use the command below:
docker-compose up -d --force-recreateWindows PC
The things you need to get started:
- A running WireGuard server
- Admin rights on a computer with Windows 10 (for the versions below 0.3.1)
When ready, follow the steps below:
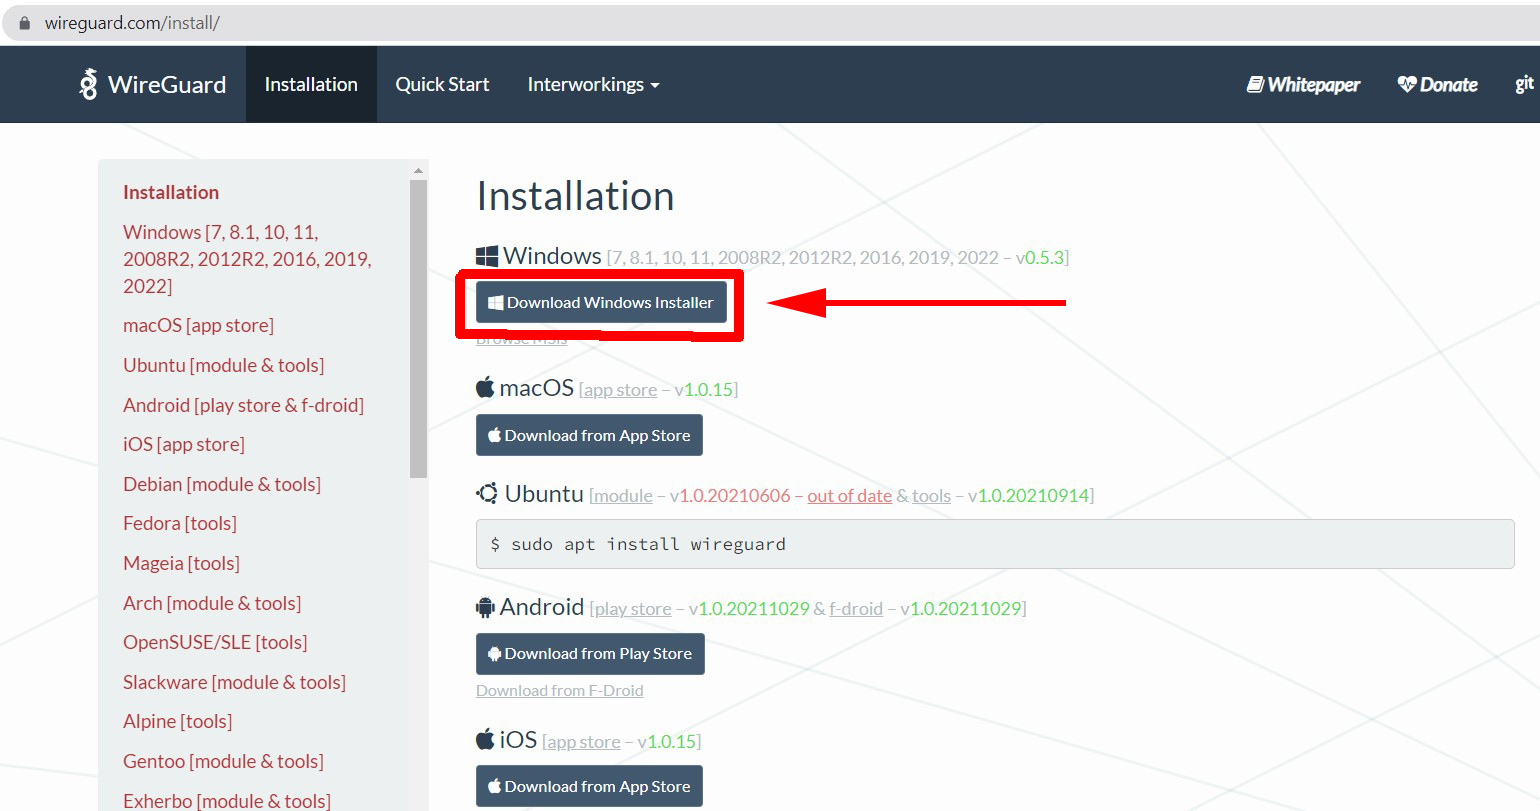
Client download
Download the WireGuard client from the official website - https://www.wireguard.com/install/
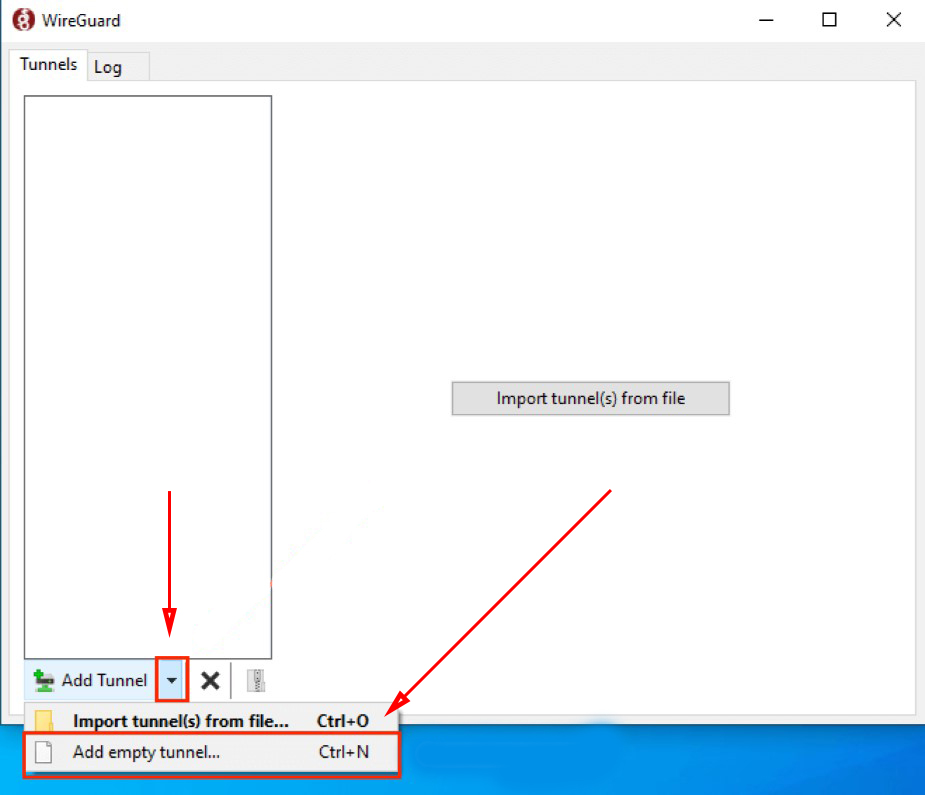
Installation and configuration
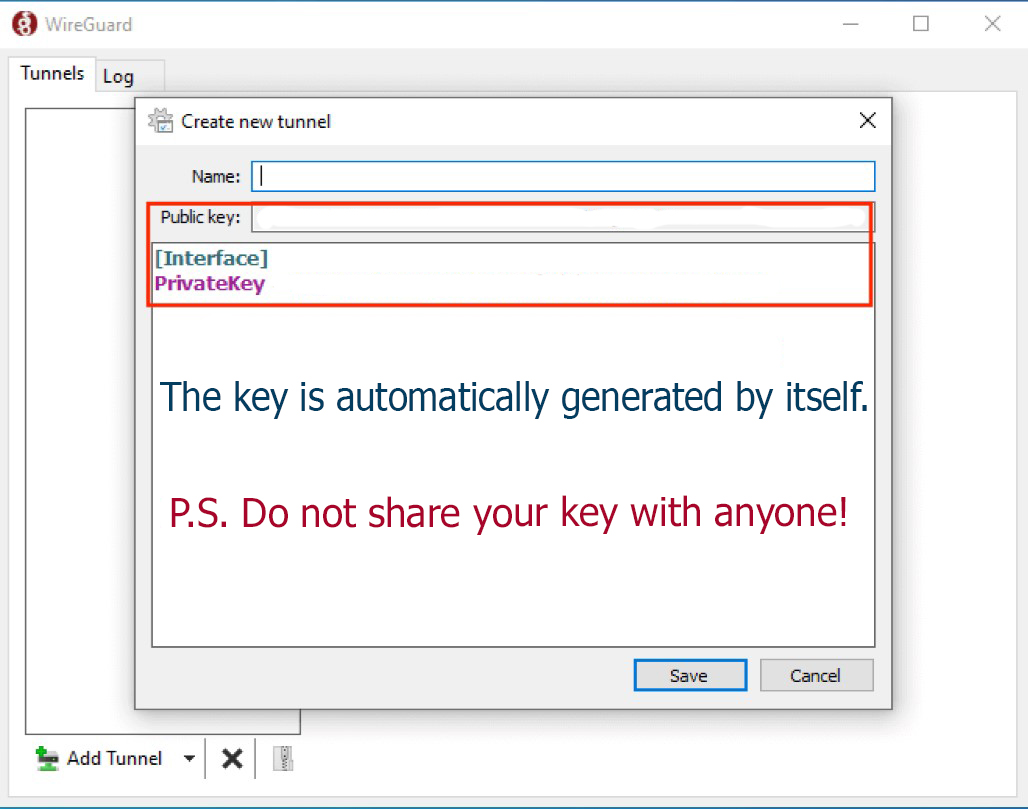
Click the arrow next to “Add tunnel” and then select the “Add empty tunnel” option from the drop-down menu.
The public and private keys will be created automatically.
Now it’s time to connect WireGuard to your server.
Configuration expansion
1. Update the configuration file to look like the example below:
[Interface]PrivateKey = abcdefghijklmnopqrstuvwxyz1234567890=+Address = 10.0.0.3/24DNS = 1.1.1.1, 1.0.0.1[Peer]PublicKey = YOUR_SERVER_PUBLIC_KEYAllowedIPs = 0.0.0.0/0Endpoint = YOUR_SERVER_WAN_IP:51820
Note! Don’t forget to replace YOUR_SERVER_PUBLIC_KEY and YOUR_SERVER_WAN_IP and make sure your Address is set to a unique IP address on your VPN.
Find below an example of what it can look like:

2. Check the Block non tunneled traffic option in the window’s lower-left corner to ensure your traffic is routed through your VPN.
Adding the client public key to your server
- Skip the option Activate on the next screen and add your key through the wg set command.
- Run the following command on your server:
sudo wg set wg0 peer YOUR_CLIENT_PUBLIC_KEY allowed-ips YOUR_CLIENT_VPN_IPNote! Replace YOUR_CLIENT_PUBLIC_KEY and YOUR_CLIENT_VPN_IP.
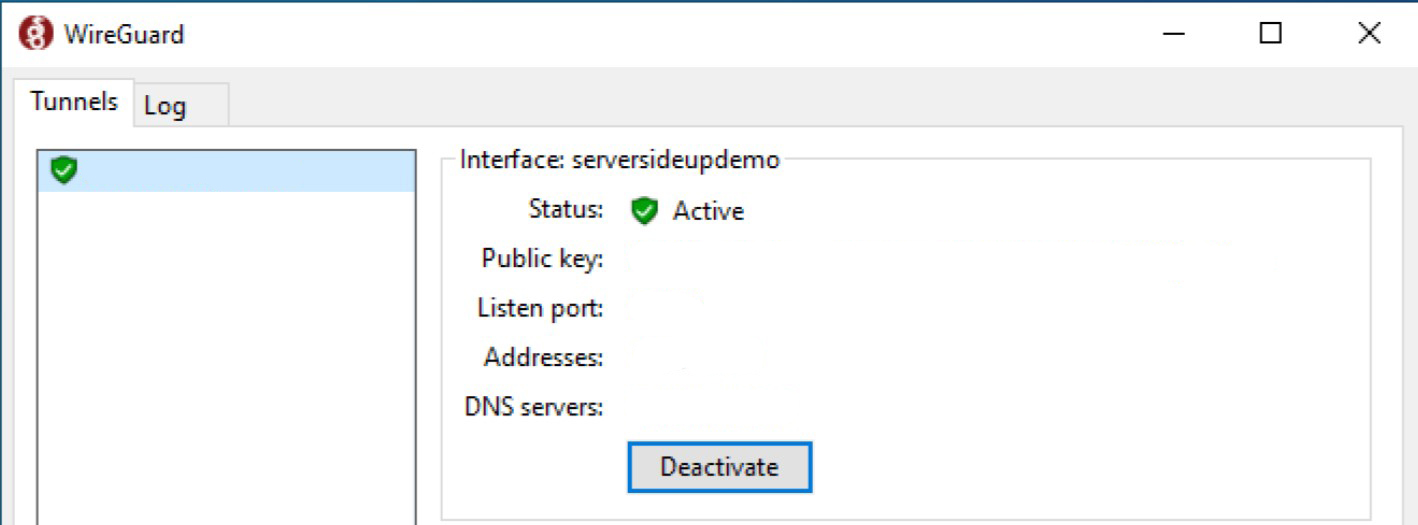
Connection testing
1. Click the Activate button on your Windows 10 machine. Here is what a successful connection will look like:
2. Now check your connection on dnsleaktest.com. All DNS tests should come back using “CloudFlare” if you followed the guide strictly.
3. Test the DNS Leak with both active and inactive WireGuard VPN and analyze the results.
4. Test your connection’s speed on fast.com. You can fix an occasional sharp speed decrease by setting up a server in a region that is close to your usual location.
Now you’re ready to go. We wish you success in using WireGuard at its full capacity.
Companion apps
knockd is a port-knock server. It listens to all traffic on an ethernet (or PPP) interface, looking for special knock sequences of port-hits. A client makes these port-hits by sending a TCP (or UDP) packet to a port on the server. This port need not be open -- since knockd listens at the link-layer level, it sees all traffic even if it's destined for a closed port. When the server detects a specific sequence of port-hits, it runs a command defined in its configuration file. This can be used to open up holes in a firewall for quick access.
Fail2ban scans log files and bans IPs that show the malicious signs. Highly recommended for simple VPS server setup
Portainer is a lightweight management UI which allows you to easily manage your different Docker environments (Docker hosts or Swarm clusters)
Minimal docker container management panel. Allows you to check the status and logs of all services of this stack. It also simplifies SSL setup and configuration.